REVIEW · WHISTLER
Zipline Adventure in Whistler
Book on Viator →Operated by Ziptrek Ecotours · Bookable on Viator
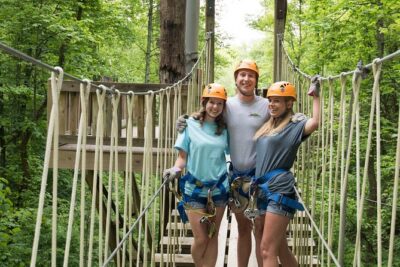
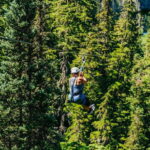
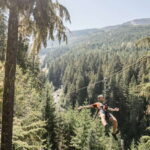
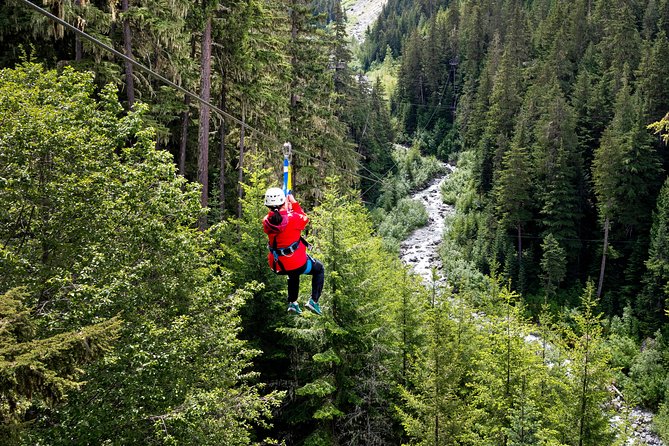
Ziplines in old-growth forest feel unreal. This Whistler adventure sends you above alpine forests and white-water rivers, with guides on hand and a route built around a true temperate rain forest. You get multiple ways to experience the canopy—suspension bridges, treetop platforms, short trails, and ziplines—so it’s not just one long ride.
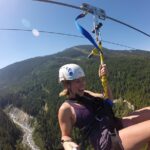
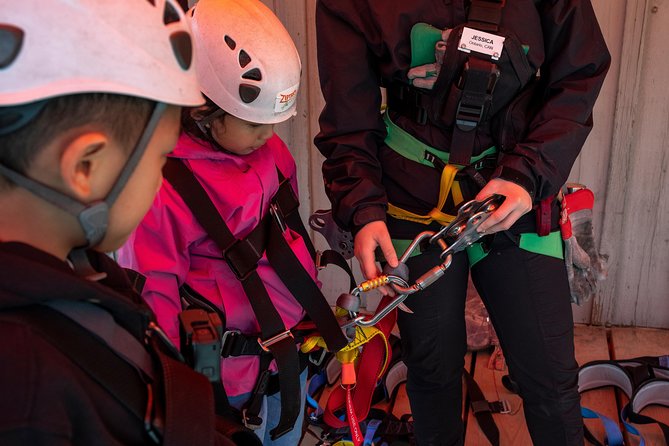
What I really like is how safe and well-run it feels from the first moment. You’ll be fitted with a harness and climbing helmet, then guided step-by-step as you connect and disconnect at each stage. Many guests call out guides like Elise and Laura for clear instructions and calm confidence, which matters when you’re nervous or doing your first zip.
One thing to consider: there’s walking between rides. Even when the zip lines are the highlight, expect stairs and uphill trail sections, so if knees or mobility are an issue, it’s smart to choose your route thoughtfully.
In This Review
- Key Highlights You’ll Actually Notice
- Entering Whistler’s Old-Growth Canopy, One Ride at a Time
- Bear vs Eagle: Choosing the Right Route for Your Group
- Transportation and Check-In: Why It Starts Smooth
- What Happens During the 2.5 Hours: A Clear Run-Through
- Safety and Guide Support: The Part That Makes People Breathe Easier
- The Real Drawback: Stairs and Uphill Walking Between Lines
- Views You Can’t Fake: Rivers, Mountain Air, and Canopy Vistas
- Equipment and Clothing: What to Wear (and What to Skip)
- Price and Value: Is $126.41 Worth It?
- Timing Your Trip: How Far Ahead to Book
- Weather Reality: Why It Usually Runs, But You Still Need a Plan
- Who Should Book This Zipline in Whistler?
- Should You Book Ziptrek Ecotours?
- FAQ
- How long is the zipline tour?
- Where do I meet for the tour?
- Does the tour provide transportation?
- What safety gear is included?
- Are there weight limits?
- What should I wear?
- How many people are in a group?
Key Highlights You’ll Actually Notice
- Two route options (Bear and Eagle) so you can match thrill level and walking time to your group.
- Harness and helmet included, plus safety instruction and help connecting every ride.
- Gravity-fed ziplines with smooth braking, so you don’t control speed or worry about hard stops.
- Old-growth temperate rain forest with suspension bridges and treetop observation platforms.
- Small group size (maximum 8 travelers) that keeps the pace friendly and the attention personal.
Entering Whistler’s Old-Growth Canopy, One Ride at a Time
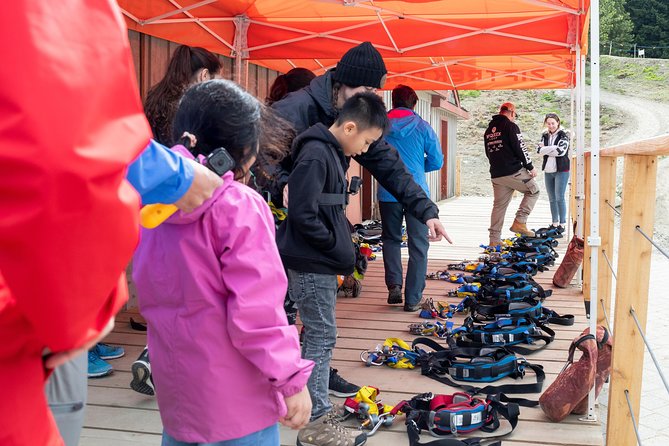
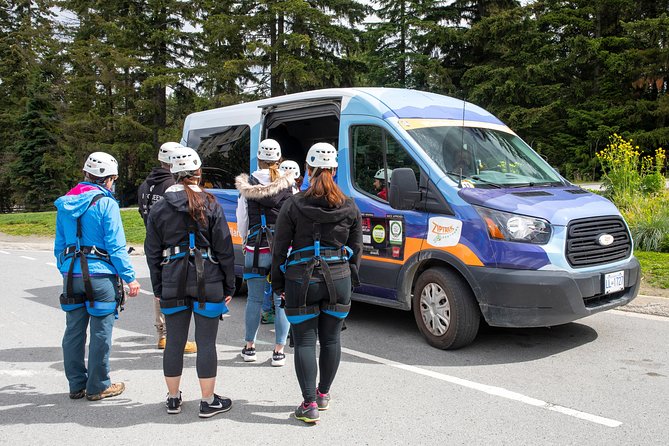
Whistler’s ziplines have a way of making you shut off everything except the view. After you’re picked up from the Whistler Village meeting point at Carleton Lodge (4280 Mountain Square), you’ll transfer to the zipline area, check in, and meet your guides. Then it’s straight to fitting: harness on, climbing helmet on, and a safety briefing that’s meant to get you ready before you ever reach the first platform.
What I love here is the pacing. This isn’t an assembly line where you’re rushed onto a single line and shuffled through. Instead, the route mixes movement types—bridges, platforms, and short ground trails—so you get breaks to look around, catch your breath, and build confidence as you go.
And because you’re in an old-growth temperate rain forest, the scenery isn’t “just trees.” You’ll see dense alpine greenery, river views from above, and a canopy that feels more like a wild place than a theme-park set. It’s that mix of real nature plus controlled adventure that makes this a strong value in Whistler.
Bear vs Eagle: Choosing the Right Route for Your Group
This tour gives you a choice of two different routes, which is more important than it sounds. The difference isn’t just number-of-lines; it’s also the overall rhythm and how much walking you’ll do between rides.
Bear Tour
- Minimum weight: 65 lbs
- Route includes 4 zip lines (with walking and stairs between).
If you want something a touch shorter and still thrilling, Bear is a great match. Families often like it because you still get the aerial wow-factor without feeling like the schedule is all adrenaline, all the time.
Eagle Tour
- Minimum weight: 75 lbs
- Route includes 5 zip lines.
Eagle is for people who want a little more time on the lines. It can also feel like a better fit for first-timers who learn fast and like momentum—just keep in mind you’ll still be dealing with the stairs and trail segments between zips.
Transportation and Check-In: Why It Starts Smooth
From your side, the logistics are refreshingly simple. You meet at Carleton Lodge, then you’re transported to the zipline course and brought back to the same meeting point after the tour.
The group size is capped at 8 travelers, which changes everything. You spend less time waiting around and more time getting fitted, briefed, and moving through the experience at a comfortable pace. It’s also one reason the guides can do hands-on checks and make sure everyone is clipped in correctly before each ride.
If you’re using a mobile ticket, you’ll be able to handle check-in without digging through paper. It’s a small thing, but it cuts down on stress when you’re already trying to look calm while you gear up for something high.
What Happens During the 2.5 Hours: A Clear Run-Through
The total tour time is about 2 hours 30 minutes. Within that window, you’ll go from Whistler Village to the course, run the forest circuit, then return.
Here’s how the experience unfolds in practical terms:
1) Transfer + check-in
You arrive at the zipline site, then meet your guides. This is where you’ll get harness and helmet fitted, and you’ll hear the safety plan.
2) Getting ready to fly
You’ll learn how to clip in and what to expect before you ever leave the platform. This is where guides make a big difference for nervous riders. People consistently praise the guides’ step-by-step support and the way they keep first-timers comfortable.
3) On the course: forest to bridges to platforms
Your journey uses a mix of:
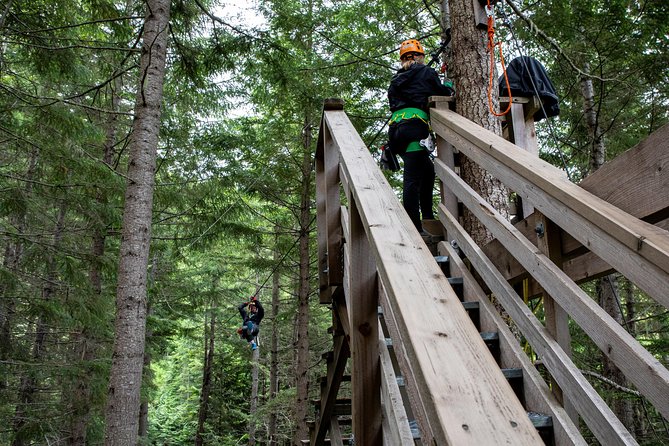
- Suspension bridges
- Treetop observation platforms
- Short ground-based trails
This matters because it breaks the experience into moments. Even between zips, you’re still outside, still moving, and still seeing Whistler from angles most visitors never get—without feeling like you’re standing in one place and waiting for your turn.
4) Gravity-fed ziplines with guided transitions
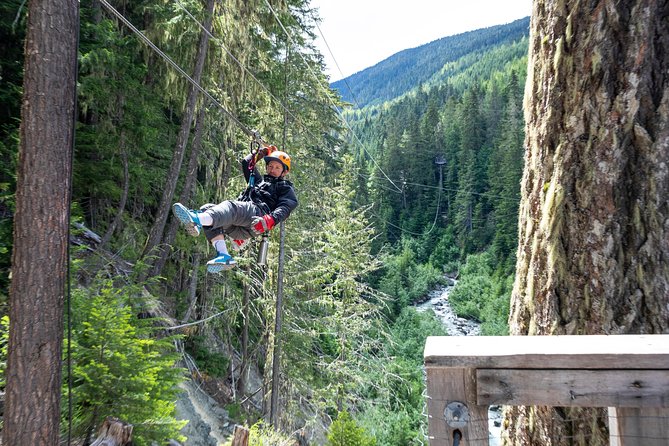
The ziplines are gravity-fed, so you do not have to control your speed. There’s also no need to manage braking. Ziptrek uses a proprietary braking system for a smooth slowdown and finish at the end of each line.
Your guides stay close for the key part: they help the rides connect and disconnect at each stage. That means you’re not left to figure out the mechanics mid-adventure.
5) Back to the village
After the final zip, you return to ground level and then back to Whistler Village at the meeting point.
Safety and Guide Support: The Part That Makes People Breathe Easier
If you’re worried about heights, this is the piece to focus on. The experience is built around professional guide support and clear safety procedures, not guesswork.
You’ll be supplied with the essential gear:
- Harness
- Climbing helmet
- Instructions on proper use
And during the actual zipping, the setup is designed to reduce decision-making. Because the lines are gravity-fed and braking is handled for you, you mainly focus on the ride itself—where you look, how you keep a steady posture, and how you enjoy the view.
In the guide lineup, names like Elise, Laura, Rebecca, Nada, Danielle, Jake, Lucy, Lee, Seb, and Kate show up again and again in the way people describe the tour: friendly, organized, and focused on keeping everyone comfortable. Even if you don’t know your group ahead of time, that track record suggests you’re in capable hands.
The Real Drawback: Stairs and Uphill Walking Between Lines
Here’s the practical truth: you don’t just sit on a platform and fly. You’ll hike and climb a bit between segments, including stairs.
This is why the tour gets high marks overall, but it also earns a few “heads up” comments. If you have knee issues, mobility limits, or you simply don’t love uphill walking, it can change how enjoyable the day feels—even when the zips themselves are incredible.
You can use this info to plan smart:
- Bring comfortable layers. Weather can change quickly in Whistler.
- Wear the right shoes (more on that below).
- If you’re choosing between Bear and Eagle, think about which route better matches your energy level that day.
For many older guests and families, the walking is manageable once they accept it as part of the adventure. For others, it’s the difference between “fun all day” and “I wish I’d paced better.”
Views You Can’t Fake: Rivers, Mountain Air, and Canopy Vistas
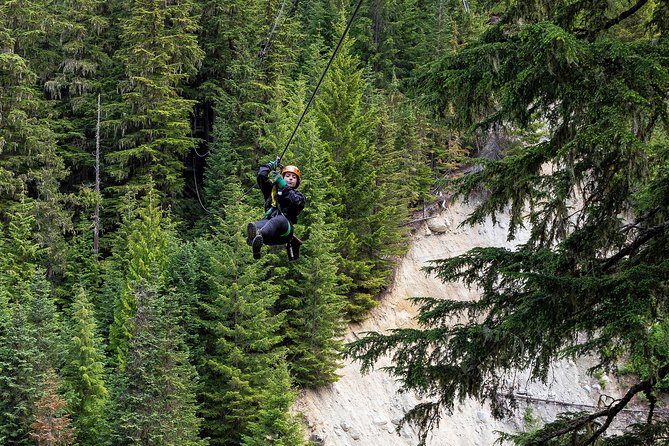
The view is the headline here, but the way you get it is what makes it memorable.
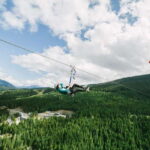
You’re not just looking through the trees from one spot. You’re lifted above the canopy, crossing suspension bridges and pausing at treetop platforms. The zips themselves glide across the forest with glimpses of rivers and the surrounding mountains.
And the scenery has different moods depending on the season. In winter, some guests describe snow-covered trees and a more wintry feel to the trek. Zipline season can be magical in Whistler because the forest changes character fast—so even if you’ve seen mountains before, the forest canopy view can feel brand new.
Equipment and Clothing: What to Wear (and What to Skip)
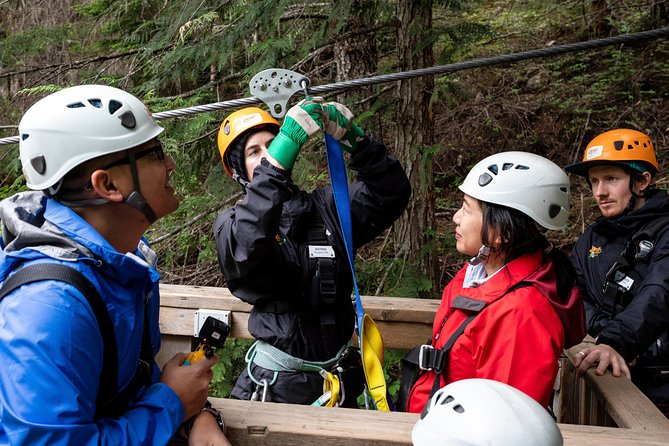
You’ll be provided with the harness and helmet. What you bring is what affects your comfort and safety.
Wear:
- Closed-toe, secure shoes
- Clothes appropriate for changing mountain weather
Skip:
- Sandals
- Slip-ons (examples given include Crocs and Birkenstocks)
This part is simple, but it’s not negotiable. The tour involves stairs and uneven surfaces between stages, so your footwear is part of your ride safety plan, not just a fashion choice.
If you’re going in winter or cool conditions, dress for cold air plus movement. You’ll be outside for the whole circuit, and you’ll warm up during walking—but you’ll still want a warm layer ready for photo stops and platform time.
Price and Value: Is $126.41 Worth It?
At $126.41 per person, you’re paying for a short, high-adrenaline experience with real infrastructure: trained guides, specialized gear, and multiple ziplines with safe transitions.
Here’s why the value can make sense:
- 2.5 hours of guided adventure is a solid chunk of time without eating your whole day.
- The experience includes multiple ziplines, not just one quick line.
- Transportation from Whistler Village to the course and back removes friction.
- Small group size (maximum 8) means you’re less likely to feel like a number.
The main value question comes down to your priorities. If you want a big nature experience with controlled safety and a strong chance of great views, this is a good use of money in Whistler. If you’re mainly seeking a relaxed stroll and zero stairs, you may find you want a different activity—or choose the route that best matches your legs.
Timing Your Trip: How Far Ahead to Book
This tour is commonly booked about 24 days in advance. That suggests demand is real—especially during busy holiday weeks.
If you’re traveling in peak seasons or with kids who need a specific route (Bear/Eagle minimum weights and age rules), booking early is smart. You’ll get more flexibility with time slots and reduce the odds of settling for a day that doesn’t fit the rest of your itinerary.
Weather Reality: Why It Usually Runs, But You Still Need a Plan
Ziptrek operates in almost all weather conditions, and if cancellation happens due to poor weather, you’ll be offered an alternative date or a full refund.
Translation: you should dress for the outdoors and be mentally ready for rain or cold. But you don’t need to assume your entire trip is doomed by a single cloud cover issue. The setup is designed for outdoor conditions—just not unsafe ones.
Who Should Book This Zipline in Whistler?
This is a strong fit if:
- You want a guided aerial adventure with clear safety support
- You enjoy views and want multiple vantage points (bridges, platforms, zips)
- You’re traveling as a family or couple and want a memorable “activity highlight”
- You like the idea of gravity-fed ziplines where you don’t manage speed
It may be less ideal if:
- Stairs and uphill walking are hard for you
- You’re looking for a totally low-mobility experience
- You’re uncomfortable with the idea of moving between platforms on a timed adventure schedule
Age and weight rules also matter. The tour is described as suitable for most travelers, with:
- Upper weight limit: 275 lbs
- Minimum weights differ by route: 65 lbs (Bear) and 75 lbs (Eagle)
- Children 6–14 must be accompanied by someone 15+ for Bear and Eagle.
Should You Book Ziptrek Ecotours?
Yes, if you want Whistler from above and you value safety structure with genuine forest scenery. The combination of included gear, professional guide support, small group size, and ziplines that run smoothly without you handling speed or braking is a big reason this experience earns consistently high praise.
I’d book this especially if you’re doing Whistler for the first time and want one activity that feels unmistakably local: old-growth forest, river views, and a canopy adventure you can’t easily recreate on your own.
FAQ
How long is the zipline tour?
It runs for about 2 hours 30 minutes (approx.).
Where do I meet for the tour?
You meet at Carleton Lodge, 4280 Mountain Square, Whistler, BC V8E 1B9, Canada.
Does the tour provide transportation?
Yes. Transportation is included from Whistler Village (the meeting point) to the tour area and back.
What safety gear is included?
You’ll be provided with a harness and a climbing helmet, plus professional guide instruction.
Are there weight limits?
Yes. The upper weight limit is 275 lbs. The minimum weight is 65 lbs for the Bear tour and 75 lbs for the Eagle tour.
What should I wear?
Wear closed-toe, secure shoes. Sandals and slip-ons are not allowed (examples include Crocs and Birkenstocks).
How many people are in a group?
The tour has a maximum of 8 travelers.