REVIEW · IDAHO SPRINGS
Idaho Springs Cliffside Zipline
Book on Viator →Operated by AVA Rafting and Zipline · Bookable on Viator
Wind in your face beats the screen.
Idaho Springs Cliffside Zipline is interesting because you’re moving through the trees on a 6-line course with suspended bridges, with a small group setup that keeps the safety briefing focused. The main thing to watch is timing and cost: you’ll want clear meeting directions and you should double-check the total price shown at checkout, since it may not match what you expected.
You start at 431 Chicago Creek Rd in Idaho Springs, ride up to the cliff in a zip truck, take in big Continental Divide views, and then work your way through the line course. You finish on Line 6 over Chicago Creek, back at the outpost.
In This Review
- Key Things You’ll Notice Right Away
- What This Zipline Feels Like Above Idaho Springs
- Getting Up the Cliffside: Zip Truck and Safety Briefing
- The Continental Divide View Moment That Sets the Tone
- Six Lines, Suspended Bridges, and the Kind of Variety You Want
- When nerves show up, what helps
- Price and Value: What You’re Really Paying For
- Group Size, Guides, and How the Day Actually Moves
- What to Wear, Bring, and Confirm Before You Go
- A quick mindset shift
- Weather, Timing, and the Best Way to Choose a Slot
- Should You Book Idaho Springs Cliffside Zipline?
- FAQ
- How long is the Idaho Springs Cliffside Zipline tour?
- What’s included in the price?
- What do I need to wear?
- Where does the tour start and end?
- Is there a weight limit?
- How many people are in the group?
- Are there different tour times available?
- Can I cancel and get a full refund?
Key Things You’ll Notice Right Away
- Cliff start, not flat-ground fun: You go up to the top by zip truck before you launch.
- 6 lines with bridges: Expect a mix of zipping and crossing elements, including suspended bridges.
- Small group energy: The tour caps at 20 travelers, which usually means more attention when you’re gearing up.
- Safety comes first: You’ll get a safety briefing and all the key gear (harness, helmet, and zipline equipment).
- Weather matters: The experience is about timing and visibility, so plan around conditions that day.
What This Zipline Feels Like Above Idaho Springs
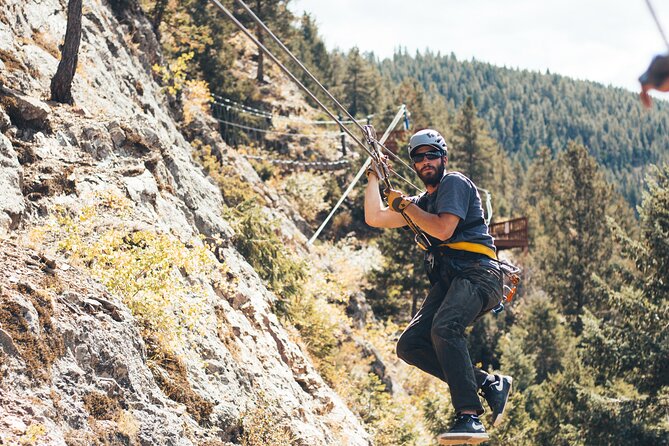
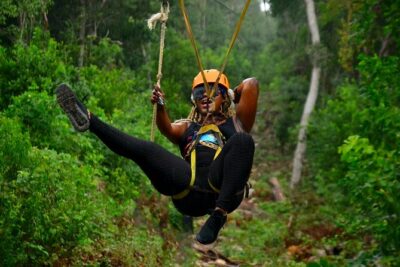
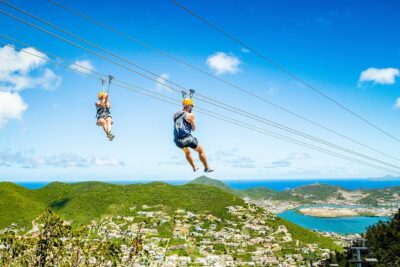
This is one of those Colorado experiences where you stop thinking and start reacting—in a good way. The wind grabs you right away, and the fact that you’re starting from a cliffside changes the whole feel. Instead of “just” zipping from platform to platform, you get that moment of height before you even begin the course.
You also get a structure that helps first-timers. The tour provides the harness, helmet, and zipline equipment, plus a safety briefing before you ever clip in. That matters because ziplining can feel intimidating if you don’t know what to do with your hands, your feet, and your body position. Here, you’re not guessing.
The most praised part is the human side. Guides like Lexi and Sunshine have been highlighted for clear explanations and encouragement. Other guide names that came up include Dodger and Jeremiah for being patient with nervous riders, and Mike and Holland for making things right when there was a hiccup. Different people, same theme: calm, practical coaching.
Getting Up the Cliffside: Zip Truck and Safety Briefing
Your trip begins at 431 Chicago Creek Rd, Idaho Springs, CO 80452. After you check in, you’ll ride in the zip truck up to the top of the cliffside high above the outpost. That short ride is more than transport. It’s your decompression moment: you look around, you feel the height, and you get ready to move.
Then comes the safety briefing and gearing up. You’ll be provided with a harness and helmet, along with the zipline equipment you need. Closed-toe shoes are on you, though. Plan for sturdy footwear that can handle steps and staying planted when you’re hooked into a harness.
A moderate fitness level is suggested. That usually means you should be comfortable walking and standing while equipment is adjusted and you wait for your turn. It’s not described as a strenuous hike, but it is an active two and a half hours.
One practical tip worth taking seriously: hydrate before you go. The tour runs about 2 hours 30 minutes, and the effort plus excitement can sneak up on you.
The Continental Divide View Moment That Sets the Tone
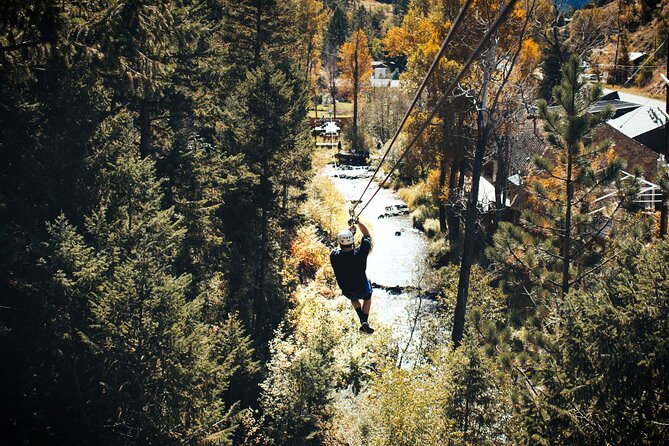
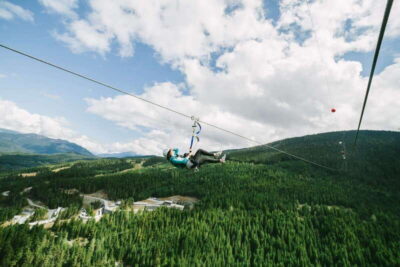
Right when you begin, you’re treated to a view of the Continental Divide. This is part of what makes the experience feel worth the effort even before you’re fully zipping. You get that “wow, this is real” feeling that makes the rest of the course click.
I like how this kind of viewpoint acts like a mental warm-up. Your body is already braced for wind and height, so you transition into the lines with less surprise. If you’re the type who gets anxious early, this gives you a chance to settle in.
It’s also why timing can matter. If conditions are poor, you might not see as far as you want. The tour does run on multiple schedules throughout the day, so if you’re aiming for the clearest view, you can try to pick a time that tends to align with better weather.
Six Lines, Suspended Bridges, and the Kind of Variety You Want
The course is a 6-line adventure. Along the way, you’ll cross suspended bridges as part of the ride. That’s the real difference between a basic zipline and one that feels like an actual aerial course: you’re not only traveling forward, you’re changing how you move and balance.
The tour description also emphasizes that you’ll end on Line 6 over Chicago Creek back at the outpost. That last section is where your confidence usually peaks. By then, you’ve already felt the rhythm of clipping in, stepping to position, and letting gravity do the work.
A key value here is variety. In the experience feedback that shaped my expectations, people liked the different styles on the course—things like tightrope-type moments and walking-on-platform elements. That kind of mixture is what keeps it from becoming one long blur.
When nerves show up, what helps
Even if you’re nervous, the experience is designed to keep you supported. Guides such as Dodger and Jeremiah have been praised for working patiently with people who are hesitant. I’d take that as a sign to speak up right when you arrive if you’re unsure about anything. Don’t wait until you’re clipped in.
Price and Value: What You’re Really Paying For
The listed price is $95.23 per person, and the tour runs about 2 hours 30 minutes. On average, it’s booked around 12 days in advance, which suggests demand and schedule fill up sometimes.
Here’s how I’d think about value:
- You’re paying for full gear (harness, helmet, equipment) and the coaching that comes with it.
- You’re also paying for the location setup: cliffside access, a zip truck ride, and a 6-line course that includes bridge elements.
- And you’re paying for the small-group cap (maximum of 20 travelers), which can make a difference if you need extra instruction.
Now for the part to double-check: there’s at least one complaint about price differences between what was shown and what was charged after booking. Since you’re buying through the booking system, costs can change by day and checkout timing. My advice is simple: before you confirm, look at the final total on your receipt page and keep it for your records.
If price transparency matters to you, don’t rely on older numbers you may have seen elsewhere. Confirm the day-of total and move on with confidence.
Group Size, Guides, and How the Day Actually Moves
The tour caps at 20 travelers, which is a solid size for a hands-on activity. Smaller groups typically mean less waiting and more check-ins while you’re learning the system.
What stands out in the feedback is guide personality and follow-through. Names that came up include:
- Lexi and Sunshine, praised for clear explanations and encouragement
- Dodger and Jeremiah, praised for patience with nervous riders
- Mike and Holland, praised for helping resolve a small snag quickly
- Tim and Sara, noted for humor and adding extra context to the day
Even if your guide name is different, the pattern is helpful: you’re likely to get both safety guidance and a lighter, human tone that makes the experience feel less like a procedure and more like a day out.
A small word of caution from a practical angle: meeting instructions should be straightforward, but one disappointing case involved confusion about where people were supposed to meet and how far they drove out of the way. If you’re coming from out of town or you’re renting a car, I’d give yourself extra buffer time and verify directions the day before. Then you’ll spend your energy on the zipline, not on navigation.
What to Wear, Bring, and Confirm Before You Go
This is one of those tours where you can make the whole day easier with a few small prep moves.
You should wear:
- Closed-toe shoes (required)
- Comfortable clothes that you don’t mind adjusting around a harness
You should expect:
- Harness and helmet provided
- A safety briefing before you start
- A moderate fitness expectation
- A maximum weight limit of 250 lbs
Other good-to-know points:
- Confirmation comes at booking time.
- Tickets are mobile.
- The tour is offered in English.
- The meeting area is near public transportation, if you’re not driving.
A quick mindset shift
Ziplining is physical, but it’s also mental. Your job is to follow instructions, trust the gear, and keep breathing. If you’re prone to holding tension in your arms and shoulders, practice relaxing them before your turn. It makes everything feel less frantic.
Weather, Timing, and the Best Way to Choose a Slot
You can choose from several tour times, which is great for building around your day in the area. Since this is outside and cliffside, conditions matter. If it’s windy, rain-soaked, or visibility is poor, your comfort and what you see from the top could change.
Pick a time that gives you breathing room. Since the experience is about 2.5 hours, add travel and check-in time so you’re not sprinting through the process.
If you’re the type who worries, go earlier rather than later. You’ll be less rushed to get geared up and positioned, and you’ll start calmer.
Should You Book Idaho Springs Cliffside Zipline?
If you want a real-feeling adventure with a cliffside start, a 6-line course, and suspended bridge elements, this is a strong pick. The value is built around included gear, a safety-first briefing, and a small-group cap that can make the day feel personal instead of crowded.
Book it if:
- You’re comfortable with a moderate physical activity level
- You like the idea of big views before you start flying
- You want guided support from calm, patient instructors
Skip it or think twice if:
- You’re sensitive to height or wind and need extra reassurance before you commit
- You don’t want any chance of cost surprises at checkout, so you should verify the final total carefully first
If you fit the vibe, plan for wind, wear your closed-toe shoes, hydrate, and give yourself extra time to find the meeting point. Then enjoy the part you came for: the ride, the bridges, and the last line over Chicago Creek.
FAQ
How long is the Idaho Springs Cliffside Zipline tour?
It’s about 2 hours 30 minutes.
What’s included in the price?
You’ll receive the harness, helmet, and all zipline equipment needed for the adventure, plus a safety briefing.
What do I need to wear?
You’ll need closed-toe shoes.
Where does the tour start and end?
The meeting point is 431 Chicago Creek Rd, Idaho Springs, CO 80452, USA and the tour ends back at the same location.
Is there a weight limit?
Yes. The maximum weight is 250 lbs.
How many people are in the group?
The tour has a maximum of 20 travelers.
Are there different tour times available?
Yes, you can choose from several tour times to fit your schedule.
Can I cancel and get a full refund?
Yes. You can cancel for a full refund up to 24 hours in advance of the experience’s start time.